
How do I add a signature in Microsoft Word?
Microsoft Word is still one of the most popular apps for creating quotes, contracts and other documents that require a signature. While there are several ways to add a signature in Microsoft Word, the two most common are to include a signature line for someone to sign after printing or to insert a handwritten signature into your document. Let’s take a look at both these approaches.
Adding a signature line in Microsoft Word
A signature line creates a location in your document for someone to sign. If you need a signature after you print the document, adding a signature line offers a professional way to do just that.
To add a signature line, first make sure you are at the area within your Word document where you need the signature to be. Now click the Insert tab and then Signature Line. You should find the signature line icon within the Text section of the ribbon menu.
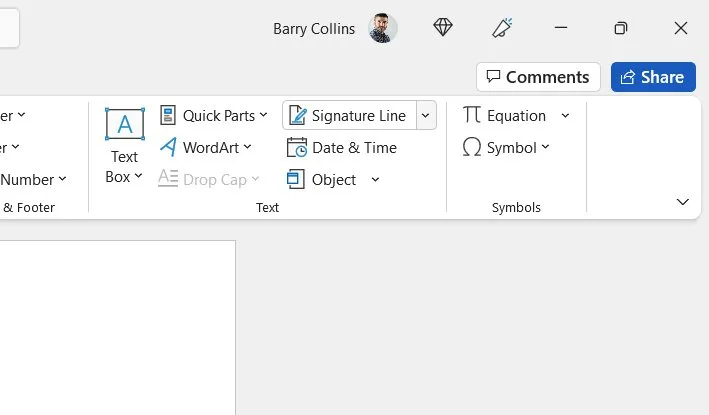
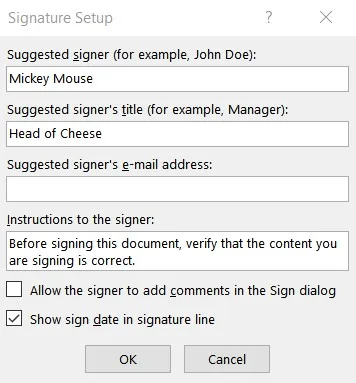
A signature setup box will now appear. You can use this box to include details, such as the signer’s name, title and email address. You can also include any instructions for the signer that you may wish to add. These details will then appear next to the signature line.
Now click OK and the signature line will appear in your document ready to sign when printed.

Adding a handwritten signature in Microsoft Word
Sometimes you need a signature inserted into your document before you print or send it. Adding a handwritten signature requires a little more effort but, once done, has the advantage of always being available to drop into a document.
To add a handwritten signature in Word, you need to first sign your name onto some white paper. Next, use your camera or scanner to take a copy and upload it onto your computer. The photo or scan needs to be in one of the following formats: .bmp, .gif, .png, .jpg.

You can now insert the signature as a picture or add it to a signature line.
Adding the signature as a picture
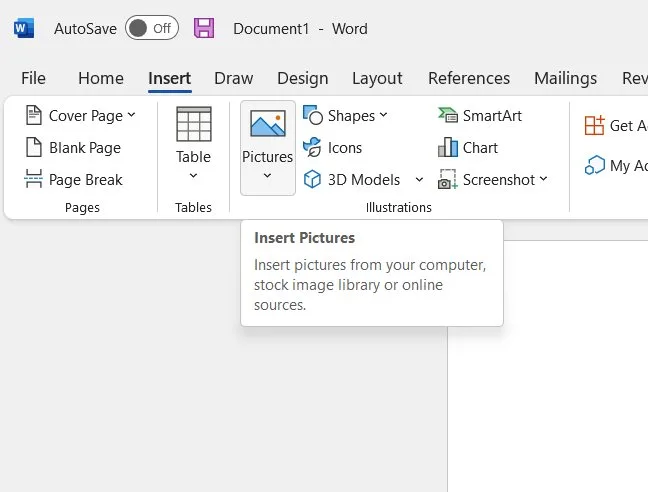
To add the signature to a picture in your Word document, first, make sure you are in the area of your document where the signature needs to be. Now click on the Insert tab and then select the Pictures icon from the ribbon menu.
The Insert Picture window will now open. Next, locate and highlight your uploaded signature. Once selected, click the Insert button.
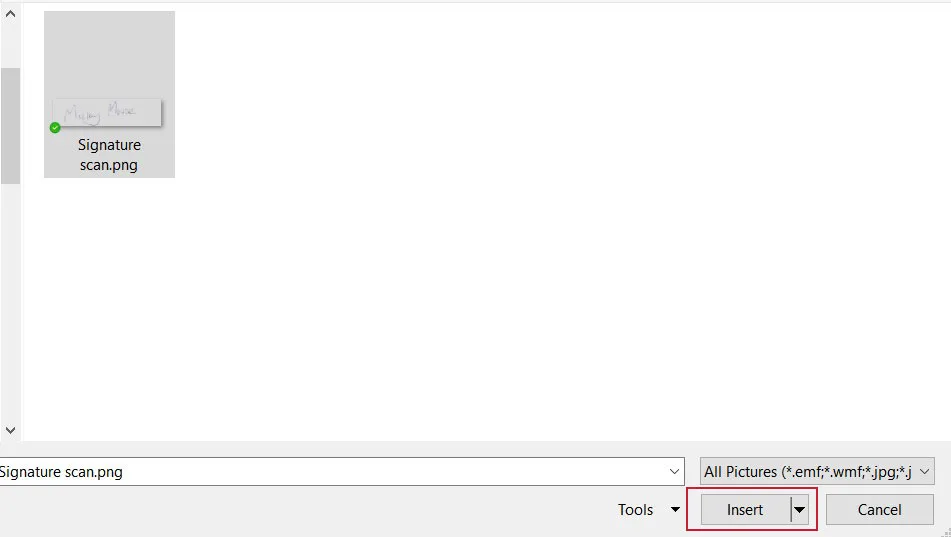
The signature will now appear in the document. If it appears too big, you can simply adjust the size by dragging the sizing handles available around the signature.
Adding the signature into a signature line
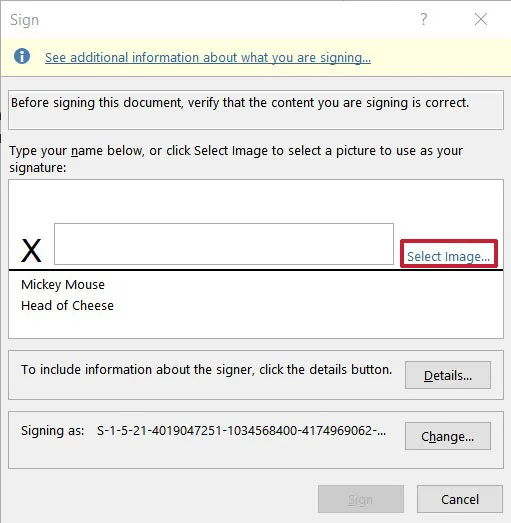
To add your signature to the signature line, first create and insert a signature line into your document as described above. Once added, double-click your signature line and choose Select Image from the sign window that appears.
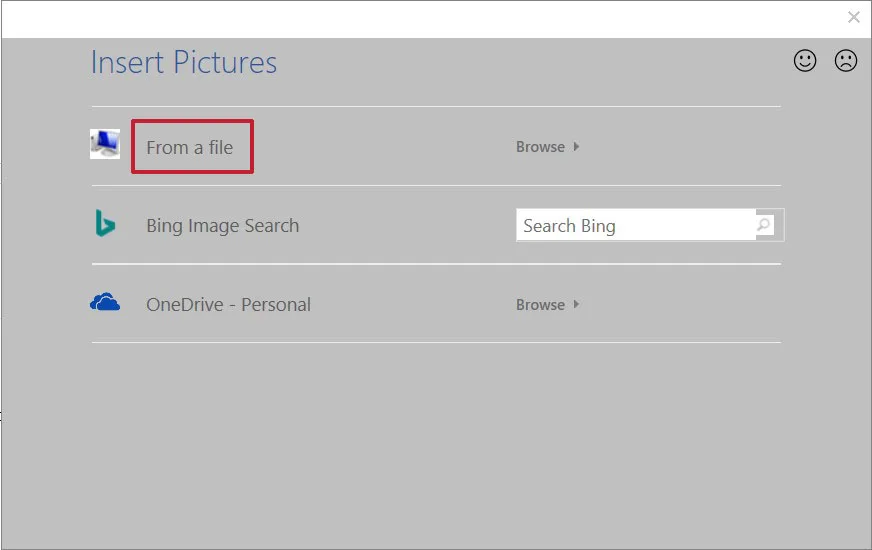
An Insert Pictures option will now appear. When it does, click on From a File.
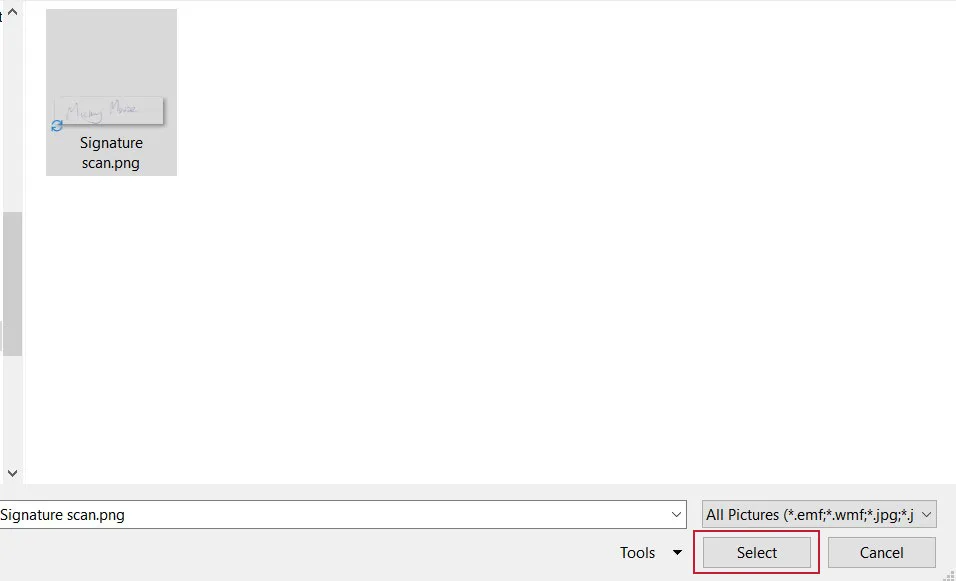
Now find and highlight your uploaded signature and, once chosen, click the Select button.
Next, click Sign and your signature will appear in your document on your signature line.

A final tip
You may find that the background to your scanned signature isn’t white enough and looks out of place in your document.

If that is the case, you can use the free online Image Background Remover by Adobe to quickly whiten things up. Just be aware that you’ll have to sign in or create an Adobe account to download your adjusted image.
More explainers

Barry Collins
NEXT UP

Dell, Hyundai AutoEver and Intel team up for AI edge ecosystem expansion
Dell Technologies has expanded its edge ecosystem with Hyundai AutoEver, a subsidiary of Hyundai, and Intel to boost manufacturers’ ability to optimise output from edge data with AI.

Jeff Engle, Head of Product at BlueVoyant: “Protecting a company from cyber attacks isn’t just the role of the CISO or his team”
In this interview, we hear from Jeff Engle, Head of Product at BlueVoyant, President of Conquest Cyber and a recipient of a Purple Heart, who served in the US Army Special Operations.

State-sponsored attackers backdoor Cisco firewalls to hack into government networks
Cisco has revealed that hackers used zero-day vulnerabilities to gain access to government networks – but we don’t yet know who exactly was behind the attacks