

ChromeOS Flex is an easy way to turn all sorts of machines into a Chromebook. It’s a functional, lightweight operating system which works well on a wide array of modern hardware, but is especially useful at breathing new life into older computers. Although ChromeOS Flex isn’t yet a finished product, it’s robust enough for us to recommend that you give it a try, but perhaps not on your day-to-day ‘critical’ machine. So, have a dig in the back of the wardrobe for that unused machine which still hasn’t made it to the recycling centre, and we’ll show you how to install ChromeOS flex on a Mac.
Things you need to know
Before you install ChromeOS Flex on an Apple Mac, there are a few things to mention. Firstly, Bluetooth isn’t available during the install procedure, so if your Mac uses a Magic Keyboard or Magic Mouse, you’ll need to temporarily swap in a USB version. We’ll show you how to revert to Bluetooth devices in the article.
Next, Google Chrome is required to create the installation media, which can be downloaded from the Chrome website. Chrome packages for versions of OS X, going back to 10.6, can be found via the Other Platform link at the bottom of the page.
Finally, you’ll also need a USB stick (8G or larger) which will be wiped during the procedure.
Stage 1: Create the ChromeOS Flex bootable USB

Open Chrome and visit chrome.google.com/webstore/

In the search box, type ‘Chromebook Recovery Utility’.

The Chrome store will display the results and the Chromebook Recovery Utility should be the top option. Before you add the extension, ensure that it’s listed as ‘Offered by: google.com’.


Click on Add to Chrome then accept the warning prompt to add the extension.

The extension is added, but it’s not obvious where it’s gone. On the Chrome toolbar, click the small icon which looks like a jigsaw piece to bring up the extensions. Select the Push-Pin icon next to the Chromebook Recovery Utility and it will become available within the Chrome toolbar. Select the icon to launch the utility.

Grab your USB stick then click Get Started.

The utility wants to know which Chromebook you wish to restore, which isn’t much use as were installing ChromeOS Flex onto an Apple Mac. Click on Select a model from a list.

Click the manufacturer drop-down then scroll down and select Google ChromeOS Flex.

Click the product drop-down menu and only one option appears. This is a timely reminder that ChromeOS Flex is in development and may be prone to certain instabilities. Click the option and select Continue.

Insert the USB and the Chromebook Recovery Utility will detect it automatically. Select it from the drop-down menu then click Continue. The next screen is the last chance to make any changes, but if you’re happy to proceed, select Create Now.

The Chromebook Recovery Utility will download the required files to install onto the USB. OS X will ask for a few permissions to give the Chromebook Recovery Utility access to the USB drive (so allow these) and the process will continue. This can take some time, so go and get a breath of fresh air or maybe take 10 for a bit of stretching.

When the process is complete, click OK, then power off the machine. That’s the first stage complete.
Stage 2: Install ChromeOS Flex using the bootable USB

Ensure the USB is inserted into the Apple Mac and then power up the machine. When the Chimes ring, press and hold the Option (Alt) key on the keyboard and the OS X boot windows appears. Select EFI Boot and don’t panic when the screen goes black.
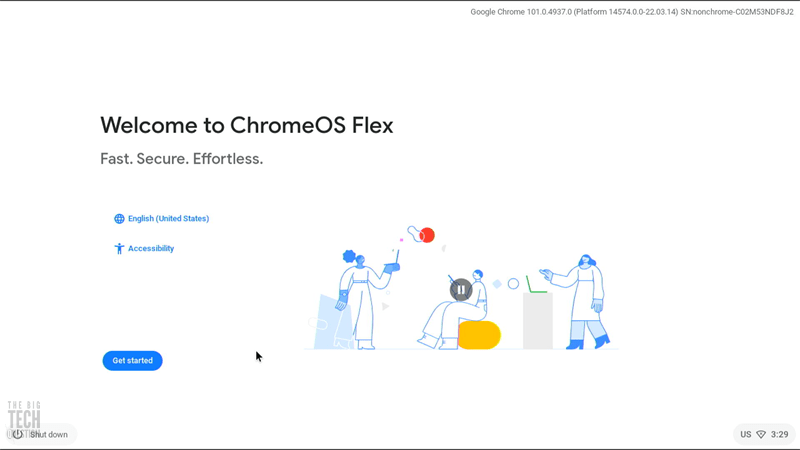
After a few moments, the ChromeOS Flex welcome screen appears with a prompt to use ChromeVox as a screen reader. Select your preference and then choose your language settings.
As we mentioned earlier, depending on which type of keyboard is in use, you may find that functionality has vanished, so plug in USB versions if required.

Choose keyboard type and then select OK, then Get Started.

It is possible to run ChromeOS Flex on a Mac directly from the USB stick, but we’ve found that stability isn’t great. A full installation definitely gives the best experience, so choose Install ChromeOS Flex and then click, Next.

Read this screen carefully. Installing ChromeOS Flex will overwrite all data on your Mac, so this is your last chance to back out (for one final check) before the magic happens. Sure? Good. Click Install ChromeOS Flex.
After one final reminder (are you sure that, you’re sure?), the process will begin.

The duration of this stage is down to the speed of your Mac, but I bet it takes a lot less time than making the USB stick did. Just time for a one-minute H.I.T with Amanda.
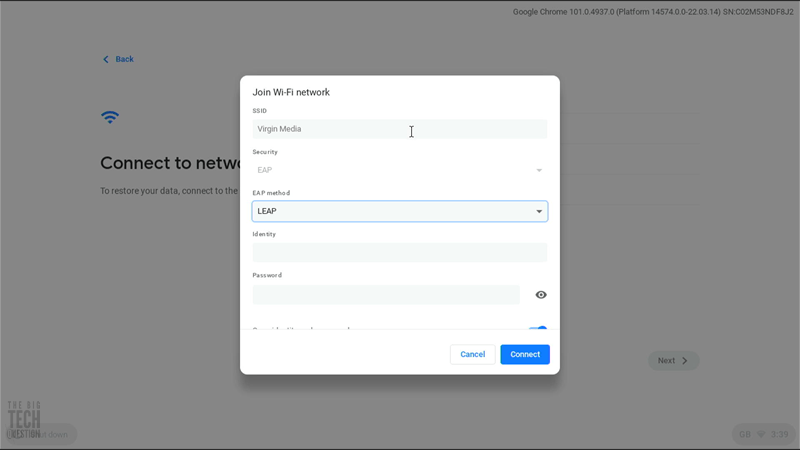
With a sense of deja-vu, select the language and keyboard settings once more, then select OK then, Get Started. If the Mac has a compatible wireless controller, you’ll be able to hook into Wi-Fi, otherwise ethernet will continue to do the lifting. It’s standard stuff at this point, select network, enter password, cross fingers.

It’s T&Cs time, so take your time to thoroughly digest Google’s Terms of Service or just click Accept and continue to proceed.

Almost there. Time to tell ChromeOS Flex precisely who will be using this Mac. We’re selected You for a standard Chrome user, but Child accounts and Enterprise logins can be used here too.

Once you’re all signed in, ChromeOS Flex will give options for syncing existing Google data to this Mac. Pop a tick in the Review sync options following setup, otherwise select Accept and continue.

As we’ve mentioned a few times, ChromeOS Flex is a development product and Google is gathering information about the hardware that’s running it. This screen explains Google’s position and shows you how to further examine what is being transmitted for ‘update filtering’.
Click Accept and continue to proceed.

The final (yes, really!) two screens relate to Google Assistant. As I have this setup on another device which uses the same account, ChromeOS Flex is giving me the option to use it here too. I’ll leave this one to you. Select No thanks or I agree.

Welcome. Your install of ChromeOS Flex on a Mac is complete. If you install COG into the Chrome browser, you can get an idea of how hard the system is working.


Stage 3: Re-activate Bluetooth

Time to fix the Bluetooth. In the bottom right-hand corner, click the lozenge with the clock to spring the menu. ChromeOS Flex will probably already have activated the Mac’s Bluetooth, so click on its symbol.

Click Pair new device and the OS will find the missing Mac peripherals and list them under Available devices. Select the device, enter the pairing code (if required) and select Pair.
Rinse and repeat until everything’s hooked up.

Changed your mind? How to remove ChromeOS Flex from an Apple Mac

As Google warned, ChromeOS Flex completely erased and re-partitioned the drive on the Mac, so to restore OS X requires a complete re-installation. On most Intel Macs (including the one I used), then restarting the Mac and pressing Option + Command + R after the chimes will begin the process. However, your Mac may differ, and Apple has a few options for you to try.
ChromeOS Flex on an Apple Mac. Is it worth it?
Oh yes!
As you can see, it’s really easy to install ChromeOS Flex on a Mac and as you’re able to reverse the process, there’s nothing to lose.
Although there are some incredibly powerful Chromebooks on the market, most people experience Google’s OS on low-powered, budget laptops. Given a bit of hardware grunt, even with old spec machines, ChromeOS Flex flies and gives a free pass into the Google ecosystem. The only thing missing, at the moment, is the Google Play Store to give ChromeOS Flex full access to millions of apps, games, moves and music. Fingers crossed; Google will remedy this omission soon.
Meanwhile, give it whirl.
How to install ChromeOS Flex on an PC
Give Microsoft Windows the elbow
I installed it on a Macbook pro 10,2 and it boots to a black screen if the installation usb is not plugged in. It will still play the chromeOS startup sound, however. Resetting the NVRAM on the laptop didn’t help either. Any ideas?
I’ve created a Chrome OS Flex installer on my Windows 10 PC, and then tried to install it on my 2011 Macbook Pro but it’s failed. Do I have to create the installer USB on a Mac in order for it to install on a Mac? Thanks