
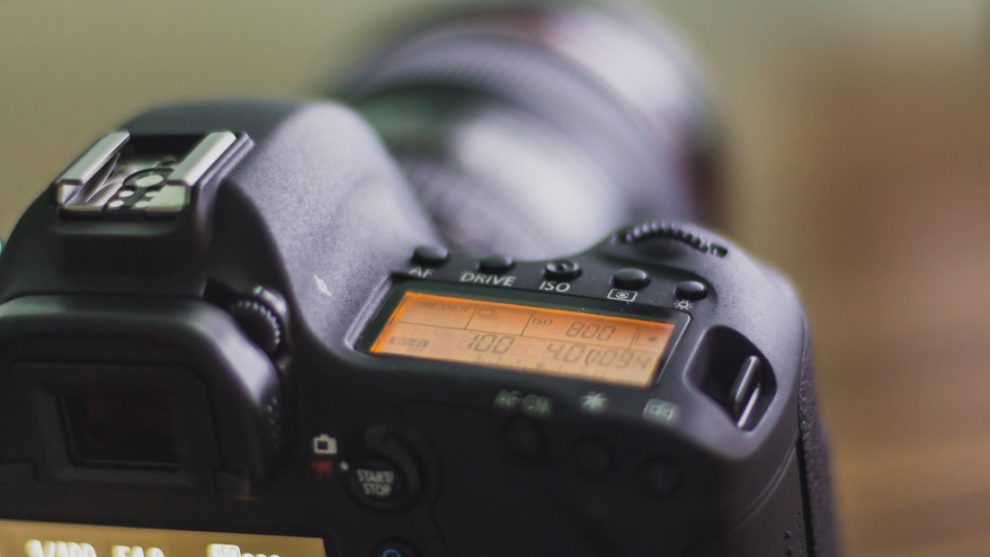
If you’ve bought a decent digital camera, chances are that it will have an ISO button. While this shorthand is familiar to experienced photographers, it often leaves beginners confused. So what is the ISO button? How can you use it to take better photos? Here’s everything you need to know.
Press the ISO button and you can choose how sensitive the film or imaging sensor will be to light. So, if you tweak it, the sensor will become more or less sensitive.
Most digital cameras have an ISO value scale between 100 (low sensitivity to light) to 12800 (high sensitivity to light) and beyond. The bigger the sensor, the higher the ISO values will go.
Here’s a typical collection of ISO values to choose from:
- ISO 100
- ISO 200
- ISO 400
- ISO 800
- ISO 1600
- ISO 3200
- ISO 6400
- ISO 12800
As you may have noticed, each ISO value is double the previous one. Consequently, an ISO setting of 400 means that your photos will be twice as bright as when the ISO value is set to 200.
How to use the ISO button to take better pictures
When you’re taking photos, you should use the lowest ISO setting possible. If left in Auto mode, the camera will normally only crank up the ISO if the shutter speed is getting so slow that you’re likely to introduce camera shake, which results in blurry images.
High ISO values are helpful when you’re in an indoor or dim environment but don’t have flash. Indeed, it’s often preferable to crank up the ISO for indoor photography than to use the weak built-in flash that comes with most cameras. That will simply over-expose the faces of the people you’re shooting and make the background pitch black. Not a good look.
You might also choose a higher ISO when shooting fast action – such as an F1 car or a diving puffin – with a faster shutter speed. Again, if there’s not enough daylight to shoot at the 1/2000th of a second you need to freeze the moving action, increasing the ISO may let you shoot at such speeds.
But there’s a Faustian trade-off: the higher the ISO, the noisier the image. Photos with a high ISO value will often be covered in a horrible grain so use the button with caution.
Here’s a handy illustration of how different ISO values will affect your low-light photography, courtesy of Vicente Pantoja.

The images in the top row (ISO 100, 200 and 400) are more or less okay, but once you get above ISO 800 the photos become grainy and blurry – until you have something resembling the Milky Way in the final two images.
Also, bear in mind that a high-ISO photo may look brilliant on your camera’s LCD screen, but terrible on your PC monitor or when they’re printed out.
READ NEXT:Â What does the Av mode on my camera do?
Add Comment