

Have you got a noisy fan inside your desktop PC? Drives you crazy doesn’t it?
You’re not alone and the great news is that it’s a really simple fix. Seriously, you’ll have this done in under thirty minutes.
This Big Tech Question will focus on sleeve bearing fans which are the cheapest and most common type around. Sleeve bearing fans are used as CPU coolers, desktop case fans and can be found inside PSUs and bolted to the sides of cheaper graphics cards.
Due to their low cost, they’re often inside games consoles, set-top-boxes, NAS drives and most other electronics that have a little fan whirring away inside them.
If you followed Barry’s guide on how to make laptop fans less noisy, but want a little more silence, then this is worth a try as sleeve bearing fans are often used in laptops too.
You’ll need a small brush, a cloth and some lubricants – I’ve put some links further down to help you out.
Step 1 – remove the noisy fan

Power down the machine and remove the fan. Never attempt this procedure on a live machine unless you’re certified as resistant to all electric shocks and are heavily insured.
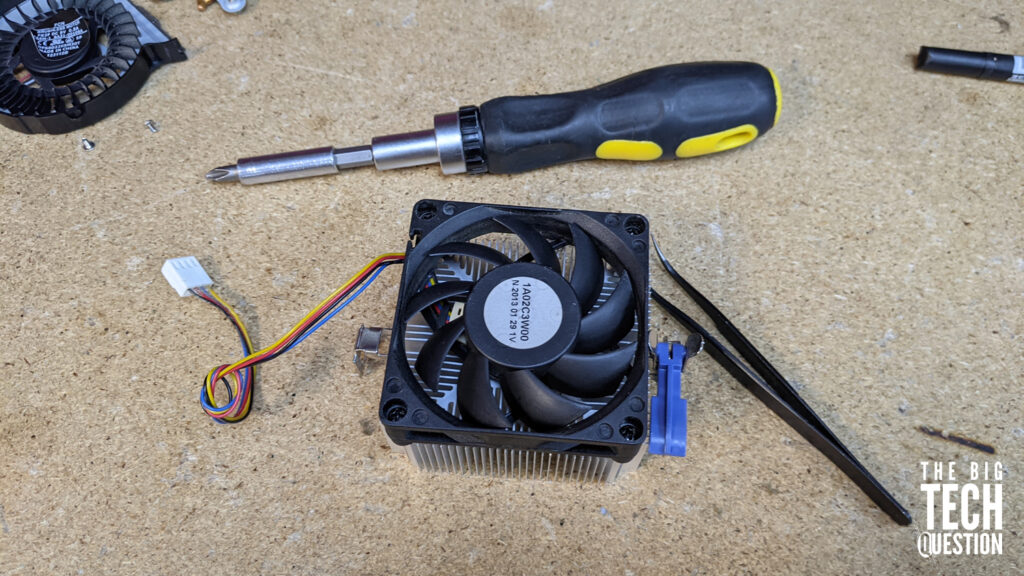
The fan we’re using is a standard CPU cooler (this one is by AMD) and as the images shows, it looks like someone has shaved a hamster into it.
As fans draw in cold air, they collect fluff, hair and other detritus from the atmosphere and over time, this collects on the fan blades, diminishing the efficiency of the cooling system. We’ll fix that in a moment.
This fan, is screwed to an aluminium heatsink. Release the screws and separate the two halves.
Step 2 – remove the heatsink

That looks nasty doesn’t it?
Use a paintbrush to de-fluff the fan. Take care around the fan blades as these can be quite brittle.
Step 3 – remove the adhesive label

Over time, the lubricant used during the manufacturing of a sleeve bearing fan dries up. Thankfully it’s easy to replace.
Put the fan ‘blades down’ and remove the adhesive label to reveal the bearing.
Step 4 – remove the circlip
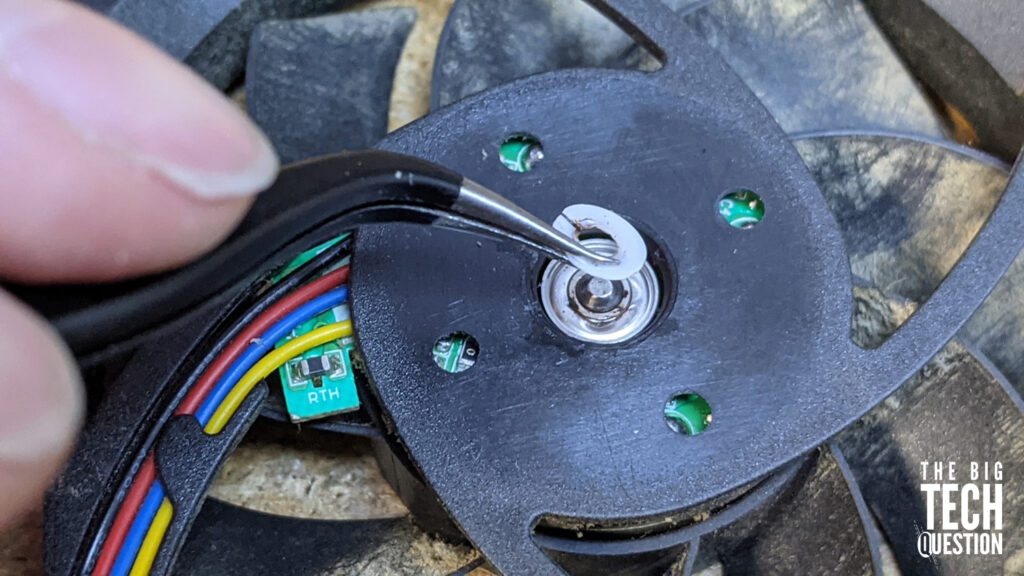
There is a small, plastic circlip holding everything in place. It’s a little tricky to remove but a pair of tweezers, a flathead screwdriver or a knife tip (used very carefully – I’m watching!) should do the job. Once it’s removed, put it to one side and do not lose it.
Step 5 – remove fan from housing
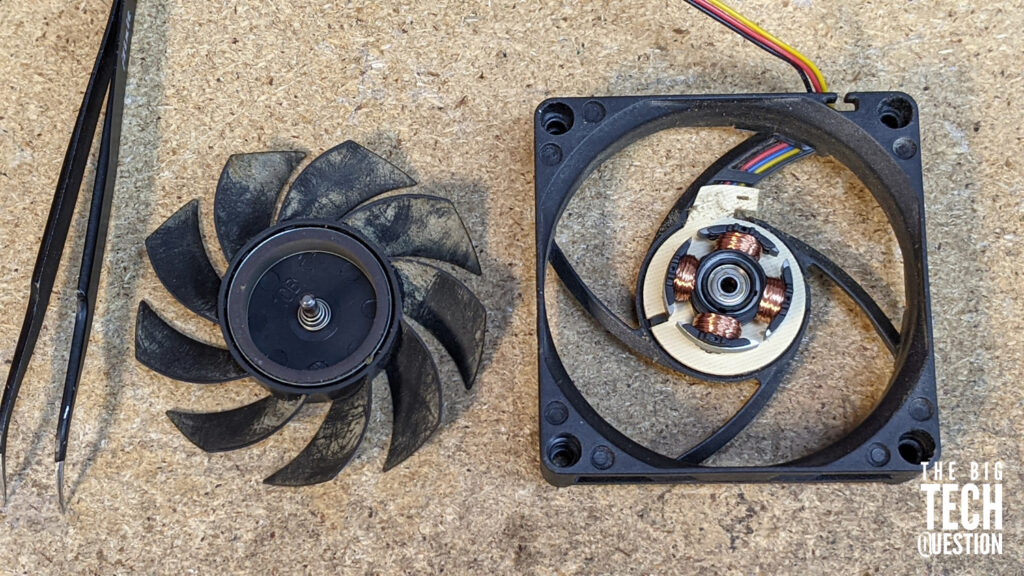
Remove the fan from the housing then use a paintbrush or cloth to remove any remaining dust and dirt. The parts need to be as free from dust as possible before the next stage.
Step 6 – lubricate the sleeve bearing

Apply a small amount of lubricant to the inside of the sleeve. Precisely which product should be applied is a hotly debated topic responsible for the commencement of several civil wars.
Personally, I use standard household oil or lithium grease. WD-40 also works very nicely but it won’t last as long, so you may need to repeat this process sooner than with other lubricants.

Whilst you’re here, lubricate the central spindle of the fan.
Step 7 – lubricate the spindle
Nearly done now.
Put the fan back into the housing and replace the circlip. Give the fan a spin (like you need telling!) to ensure it’s spins freely and silently. Finally replace the sticker and then re-mount the fan back into your system.
Conclusion
I said it was an easy fix. A quick squirt of something slippy, will rejuvenate a fan and improve its aged performance. As sleeve bearing fans are so common, you can apply this fix to all sorts of devices.
Don’t put up with noisy fans which overheat your machine and give you banging headaches. A little investigation (and a bit of lubricant) can often resolve the issue and save you the cost of a replacement.
READ NEXT: What is the best SSD upgrade for my PC?
Add Comment