

If you’ve found yourself in a situation where you need a screenshot on a Kindle Paperwhite, you’d be forgiven for not knowing what to do. I was surprised to learn Kindles could even take screenshots. Fortunately, although not at all obvious, it’s a very easy process. Let’s get into it.
How do I take the screenshot?
Unlike most devices, the Kindle doesn’t use a combination of button presses to capture the screen. I mean, there is only one, and it already has functions assigned to a tap and a long press.
Instead, you need to simultaneously swipe in from two diagonal corners. This will work on both pairs of diagonals, either the top left and bottom right, or top right and bottom left. Refer to the diagram below if you’re confused.


Tapping the two corners simultaneously will work too, but I’ve found it to be far less consistent. You’ll know that the screenshot has been successful when the screen flashes.
Where do I find the screenshots?
Taking the screenshots is all well and good, but where do you actually find them? The files aren’t accessible directly from the Kindle, so you need to connect it to a computer via a micro USB cord (such as the one used to charge the Kindle). Once you’ve plugged it in, the Kindle will enter “USB Drive Mode”, and you won’t be able to interact with the device.
On your computer, open File Explorer. The Kindle should have been recognised as a drive, and “Kindle (E:)” will appear in the sidebar. Click on that, and you’ll see all your screenshots neatly compiled.
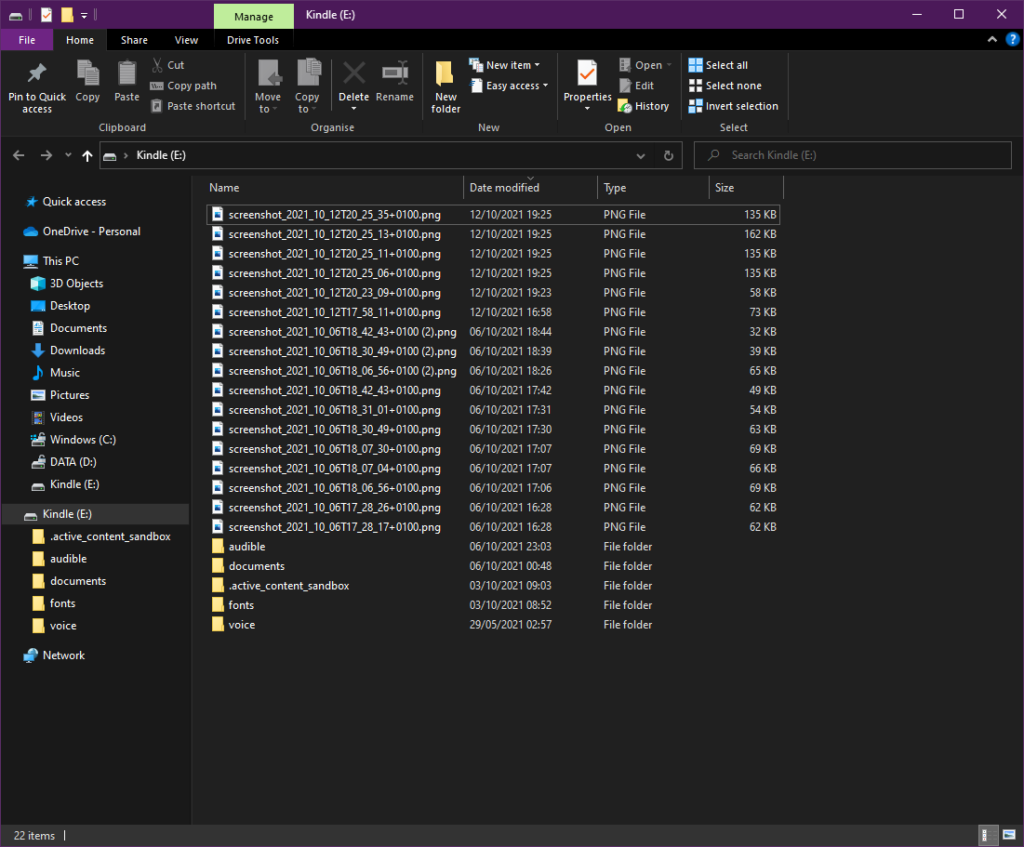
From here you can move them into your own pictures folder, or just upload them somewhere straight from the Kindle drive – the eReader is your oyster.
Conclusion
Taking a screenshot on a Kindle Paperwhite might seem strange, but it’s a useful thing to know how to do. Follow the steps in this guide, and screenshot to your hearts content.
READ NEXT: How do I turn off Popular Highlights on my Kindle Paperwhite?
Add Comment